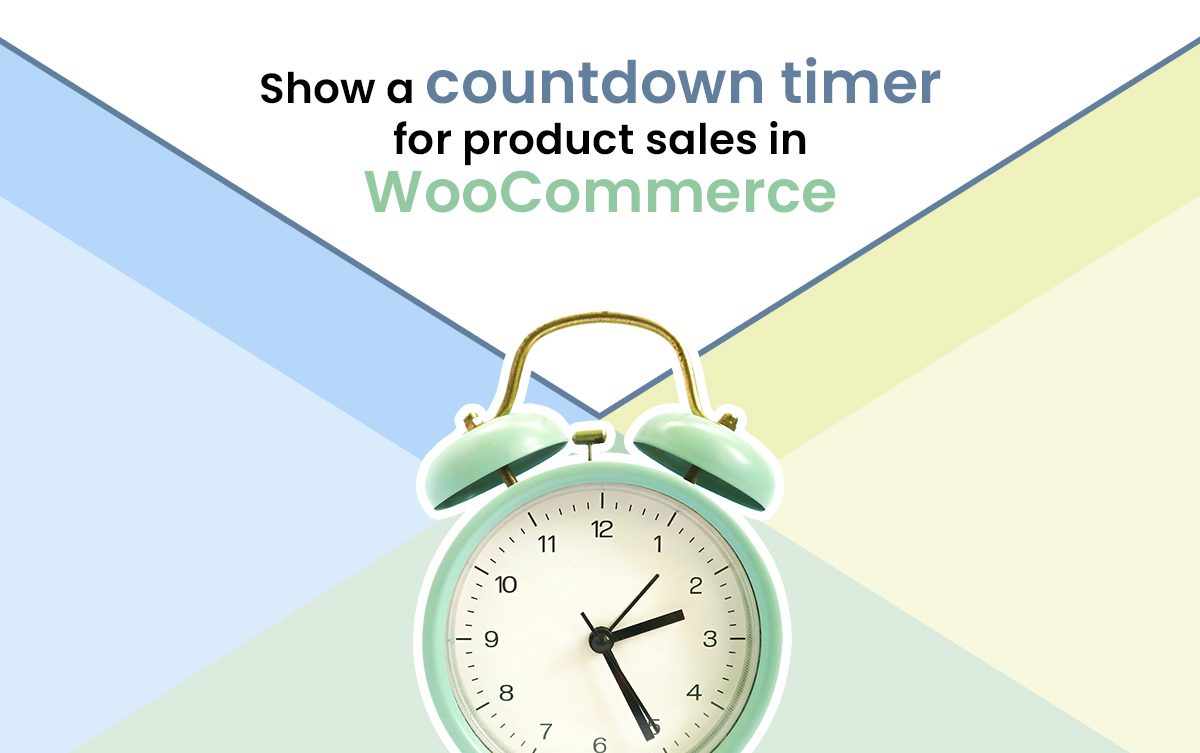
Whether you’re setting up a sale or a sale is ending soon, creating a WooCommerce countdown timer for your products can give customers an extra incentive to buy.
So if you’re looking for a guide on setting up your very own sale countdown timer for WooCommerce, this guide has your back.
In this guide, we’ll show you:
- Why sale countdown timers are a good idea in the first place.
- How to set up a sale in WooCommerce.
- How to add a WooCommerce countdown timer to your online store.
So first things first. Why should you bother adding a countdown timer to your WooCommerce store in the first place? What are the benefits?
Why create a sales countdown timer for WooCommerce
The main goal of a countdown timer is to give you, the store owner, a way to encourage your customers to make purchases. But there’s a little more to it than that.
A WooCommerce countdown timer instills a sense of urgency
Let’s say you already have a sale on your WooCommerce store. Your products have a sale tag or product label, and the sale price is clearly visible, but something is missing. Customers don’t know when the sale ends, so they don’t have any sense of urgency to buy.
Time limitations trigger a customer’s desire to avoid losses (especially if an offer is good). After all, studies show we care more about losses than gains.
So when a countdown timer is added to your store, you’re encouraging them to act quicker than they might have otherwise to avoid a loss
A countdown timer gets customers excited about coming soon sales campaigns
The same can be said for sale events that are coming soon. If you’re planning a big sale campaign and worry that customers may not spend money if they see a sale is coming – don’t.
Instead, inform them a few days in advance with a countdown timer, bringing customers back to the sale.
You can bet they’ll spend more than they would have when they return simply because you have a sale on.
A sale countdown timer adds a visual cue to your product pages
We all know that the simpler product pages are, the quicker customers can get the information they need and move onto the cart page or checkout.
The more visual information we can give to customers as store owners, the better. So when using a WooCommerce product countdown timer, you’ll give customers essential visual information that your sale is ending soon.
So now we know why adding a countdown clock or timer to your store is a good idea. Let’s get it added.
How to add a WooCommerce countdown timer to your store
The default WooCommerce install doesn’t allow you to add a countdown timer to your WooCommerce store. So to do this, we’ll need the help of a sales countdown timer plugin. Specifically, the WordPress plugin Salesman.

Customer loyalty made easy
Features for customer loyalty with smart functions to increase usability and traffic. Selling easier than ever: Salesman.
Create a sale timer with the plugin Salesman
Salesman is the only sales-boosting companion you need for your WooCommerce store. As well as allowing you to add a sale countdown timer, Salesman will help you boost sales throughout your entire WordPress website with the following features:
- Cross-sells and upsells.
- A free shipping progress bar.
- New customer coupons.
- Popular products.
- A built-in referral program.
- And so much more.
But let’s get specific on the type of WooCommerce countdown timer you can add with Salesman.
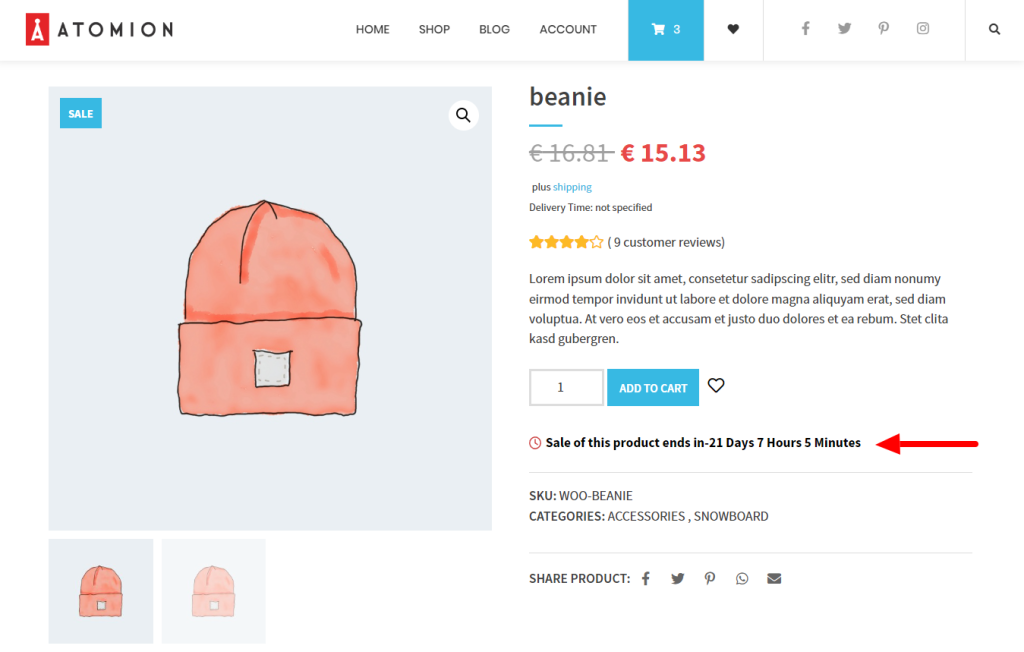
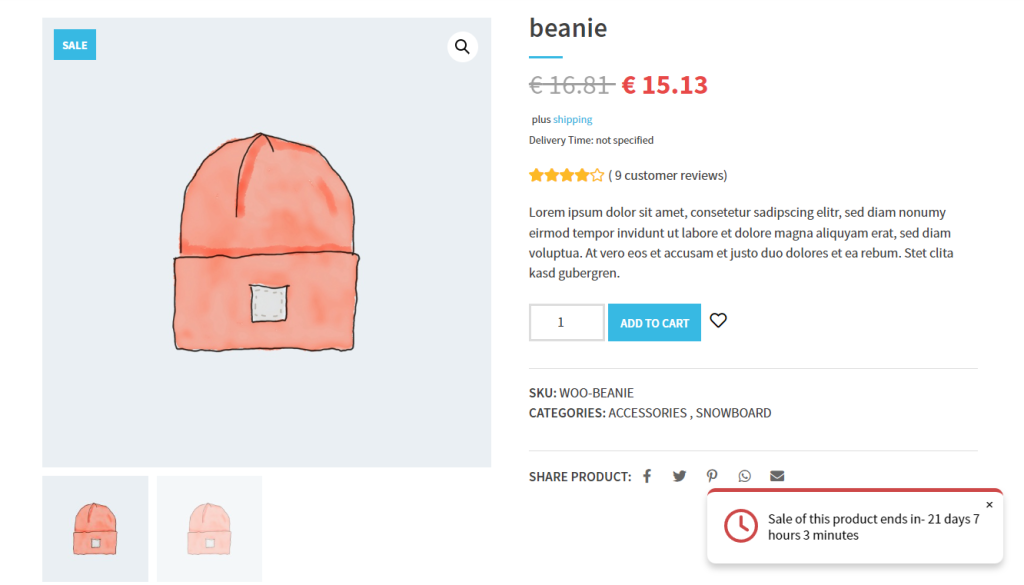
Sale ending soon countdown timer
Salesman uses your existing sale setup in WooCommerce to then display your countdown timers. So if you have a sale ending soon, a countdown timer will automatically display on the single product page (depending on the settings you customize).
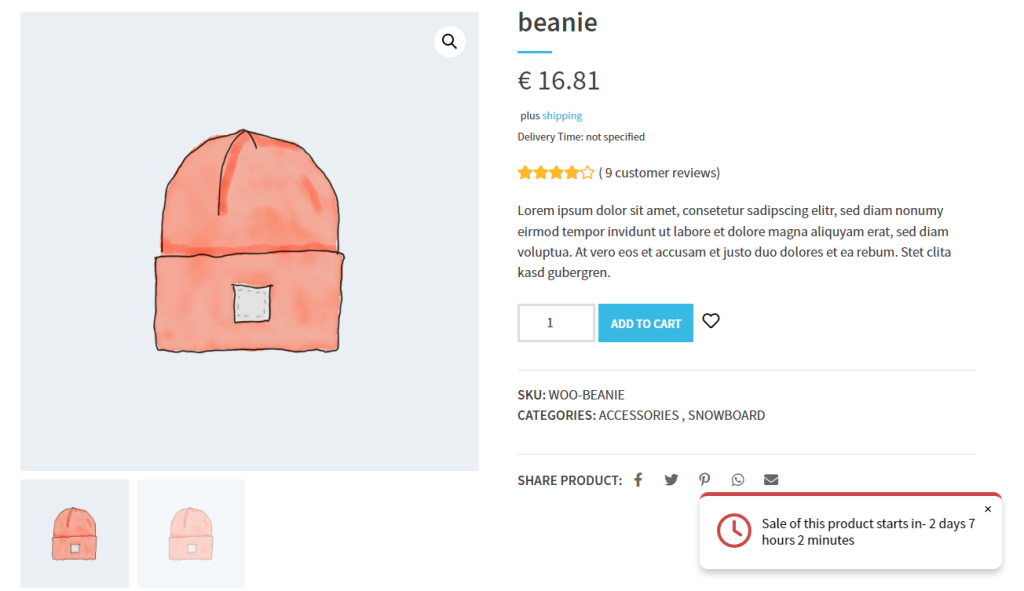
Sale coming soon countdown timer
The same goes for any sales you have coming soon. You’ll be able to turn on a setting that displays either a message with a countdown timer within the product description or a pop-up that displays at the top or bottom of the screen.
Salesman’s countdown timer styles can be customized to suit your particular store. Including everything from the notification style, to its position, and more. Plus, you can get even more specific with an included shortcode – so you can display the countdown timer wherever you want.
So now we know how Salesman works, let’s get it set up so you can increase conversions in your WooCommerce store.
Step 1: Install the WooCommerce plugin Salesman to add a countdown timer
The first thing we’ll need to do is purchase Salesman from the MarketPress website: marketpress.com/salesman
Customer loyalty made easy
Features for customer loyalty with smart functions to increase usability and traffic. Selling easier than ever: Salesman.
Then, follow these steps to get it setup:
- Go to Plugins > Add New > Upload plugin in the WordPress dashboard.
- Select the ZIP file you downloaded from your computer and install it.
- Enter your license key to activate Salesman when the installation is done. You’ll find the license key when you log in to your dashboard in the MarketPress account.
Next, we’ll create our WooCommerce sale.
Step 2: Create your sale
Before we set up the countdown timer, we’ll need to put some products on sale. If you’ve already done this, you can skip this section.
To create a product sale in WooCommerce, take the following steps:
- From your WordPress dashboard, go to Products > All Products.
Depending on the type of sale you want to do, we’ll break down the steps below.
If you’re creating a site-wide sale that’s going live right away, take the following steps:
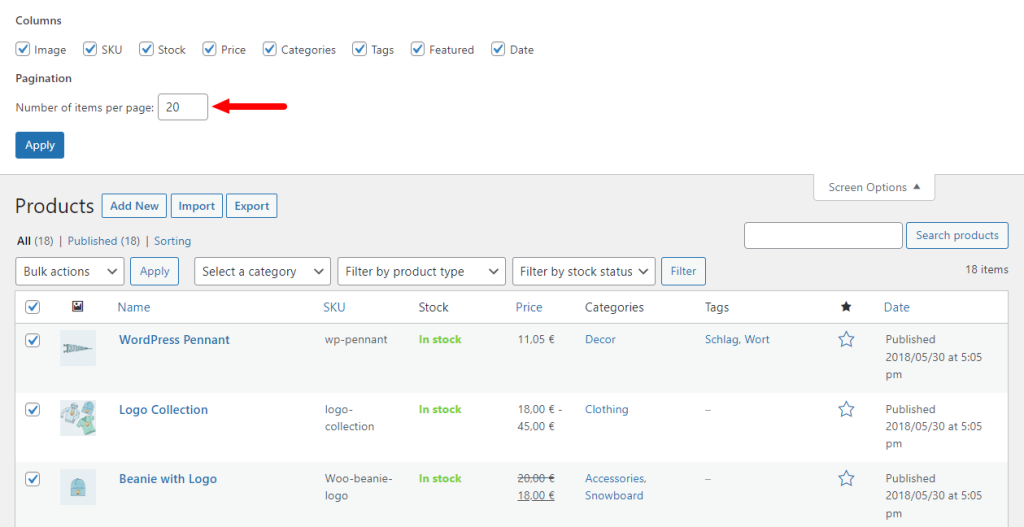
- Click the checkbox on the far left at the top of the table – this will select all your products. If you have more products than those on this page, click the Screen Options dropdown at the top of the page and change the number of items per page to the number of products you have in your store. Then click Apply.
- With all your products selected, click the Bulk actions dropdown and select Edit. Then click the Apply button next to this.

- Once clicked, a bulk edit screen will appear. Scroll down until you reach the Product data section and find Sale.
- Select the discount type from the dropdown and then entire the amount in the field that appears.
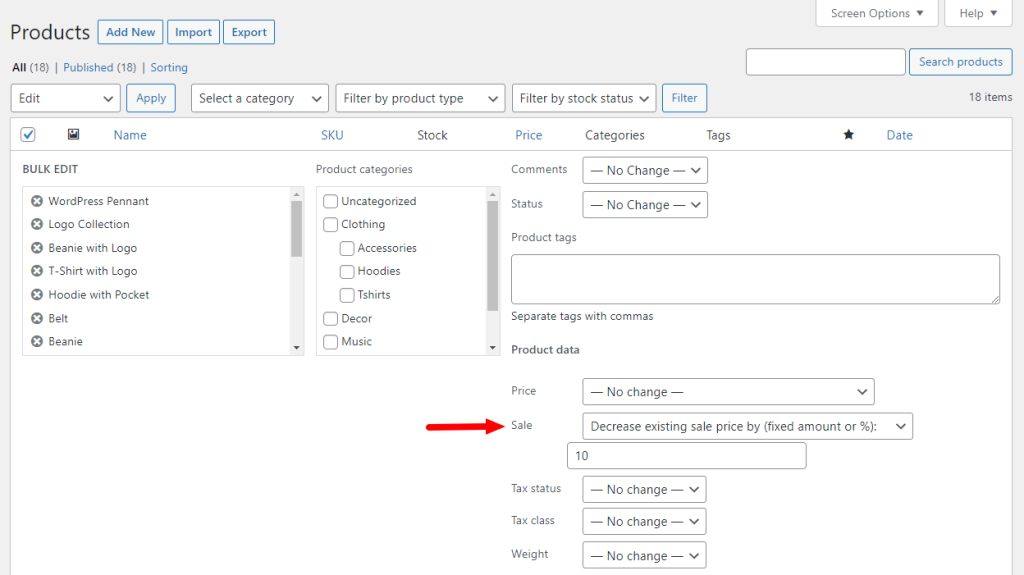
- Once you’re happy, click Update, and all your products should have new sale prices.
If, however, you’d like to schedule a sale, you’ll need to set this up per-product. To do this, take the following steps:
- From your WordPress dashboard, go to Products > All Products, then click to edit the product you’d like to schedule a sale for.
- Scroll down to the Product data section of this page. Underneath Regular price, you’ll see Sale price. Add the sale price you’d like in this field.
- Next, click the Schedule link right below it. This will bring up the Sale price dates fields. Add your special offer start and end dates into this section.
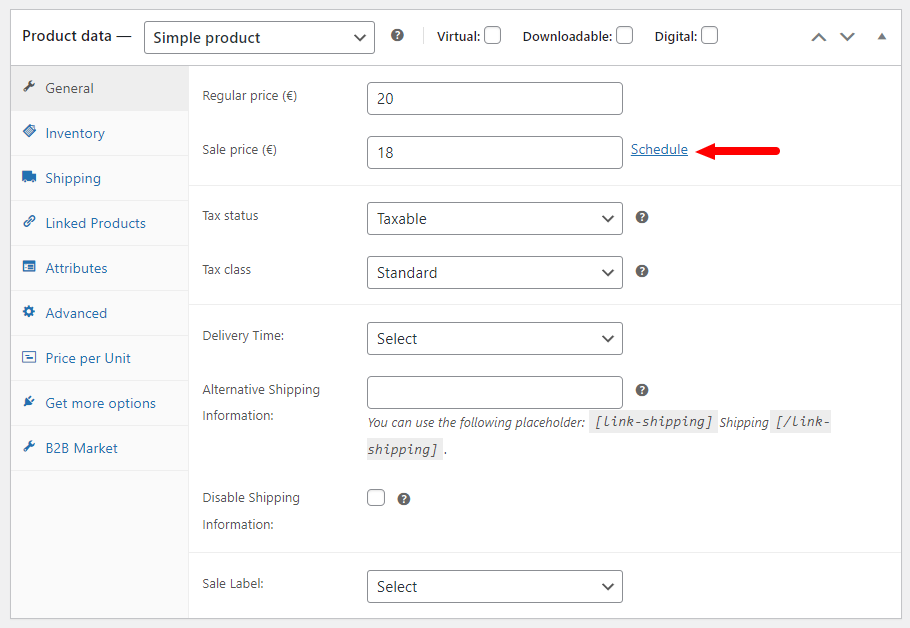
- Once done, scroll up the page and click Update or Publish.
Note: Both of these techniques work with all product types, including variable products and digital products.
So now we have our sales set up, let’s add the countdown timer.
Step 3: Set up your WooCommerce countdown timer
In this tutorial section, we’ll presume you have your sales set up, and your product prices have been updated. We’ll include instructions for setting up a coming soon countdown timer, and a sale ending soon countdown timer.
To set up both, take the following steps:
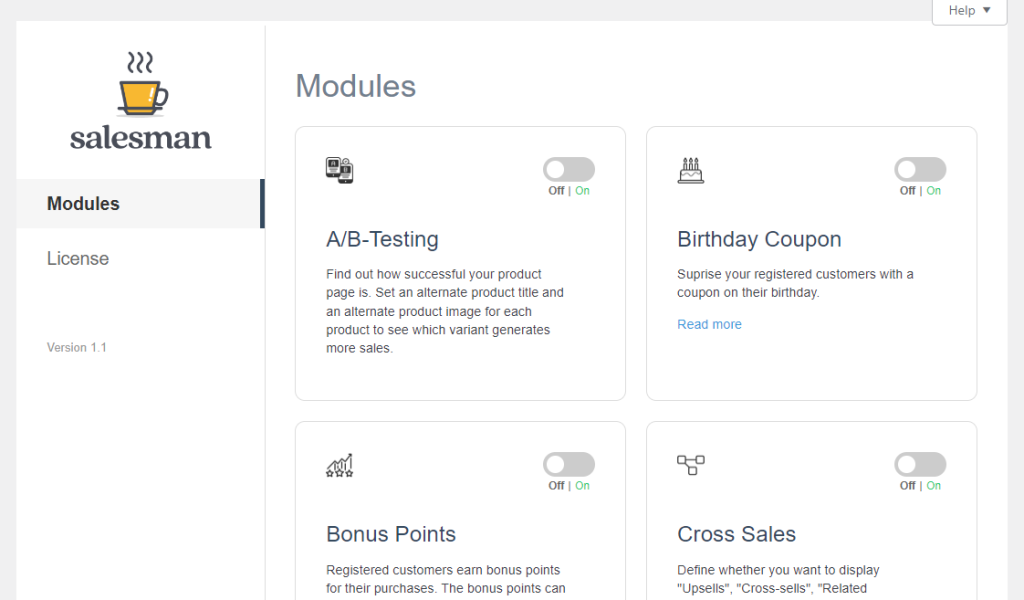
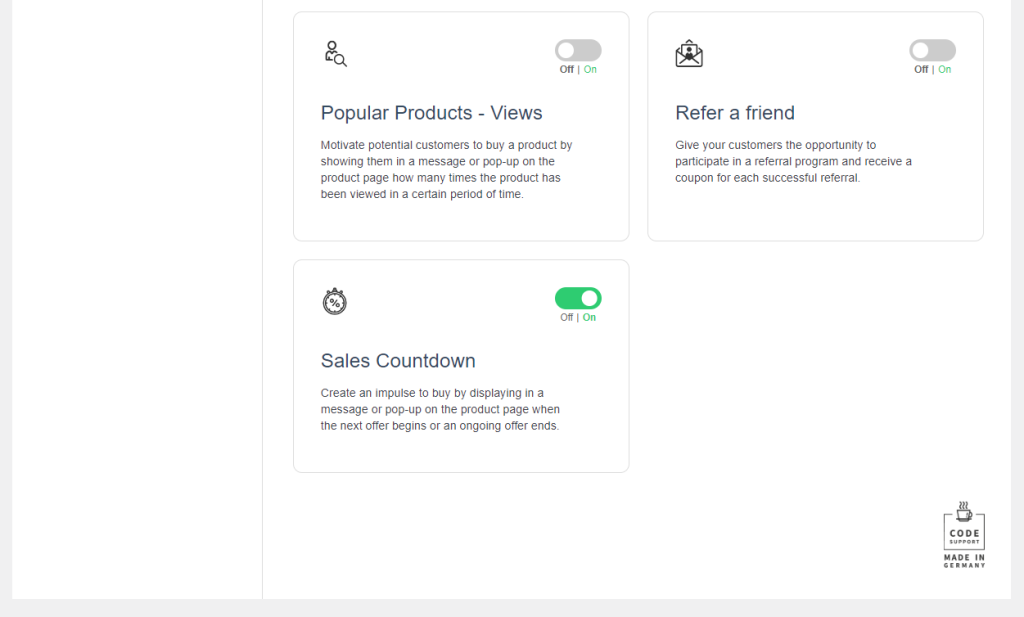
- From your WordPress dashboard, go to WooCommerce > Salesman and click on themodule called Sales Countdown to turn it on.
- Once done, the page will refresh, and you’ll see a new menu item called Sales Countdown. Click on this, and you’ll be taken to the countdown timer settings page.
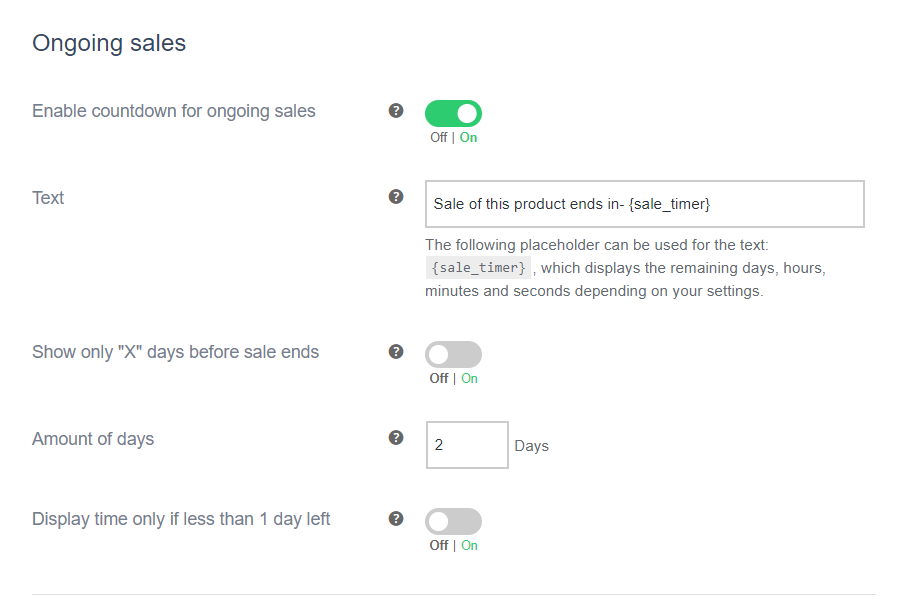
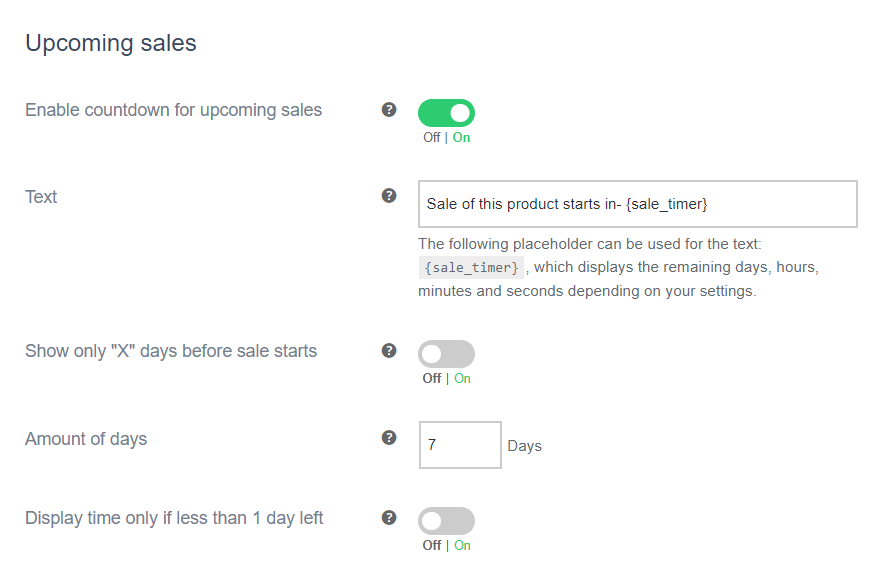
- The first thing you’ll be able to do is decide which countdown timers you want. If you want an Upcoming sales countdown, or an Ongoing sales countdown, click the first toggle button in each section to turn them on.
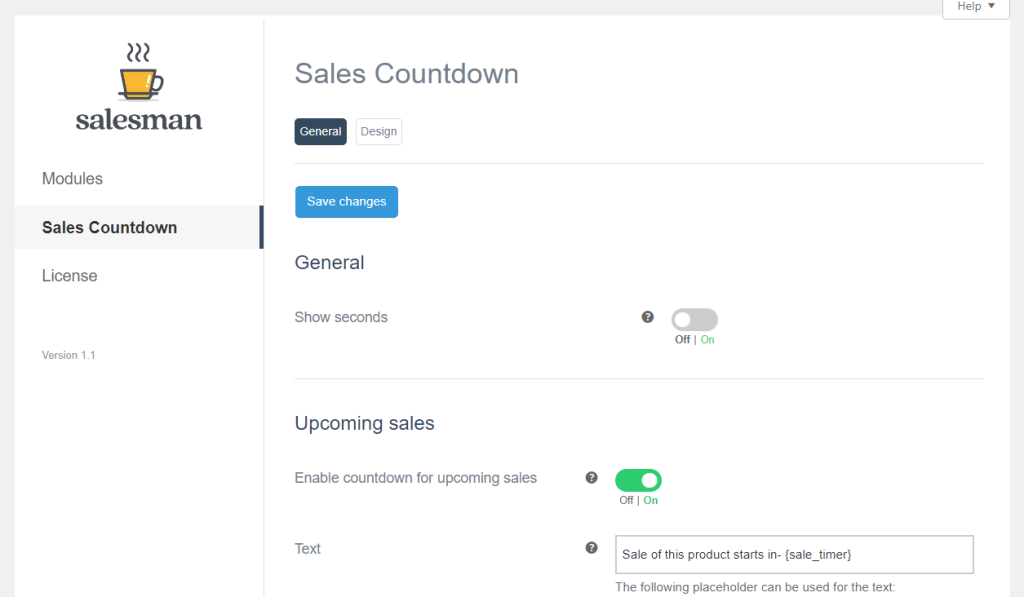
- Next, you’ll have the option of customizing the text that appears on the countdown timer itself. Customize this however you want to make it appealing for your customers.
- After this, you’ll have a few customization options that will allow you to fine-tune when your WooCommerce countdown timer appears.
- Once you’re happy with these changes, click the blue Save Changes button at the bottom of the page.
Next, we’ll customize the countdown timer’s look and feel to suit your store. To do this, take the following steps:
- Click the Design tab at the top of this page, and it will take you to a set of customization options that will allow you to fine-tune your countdown timer’s look and feel.
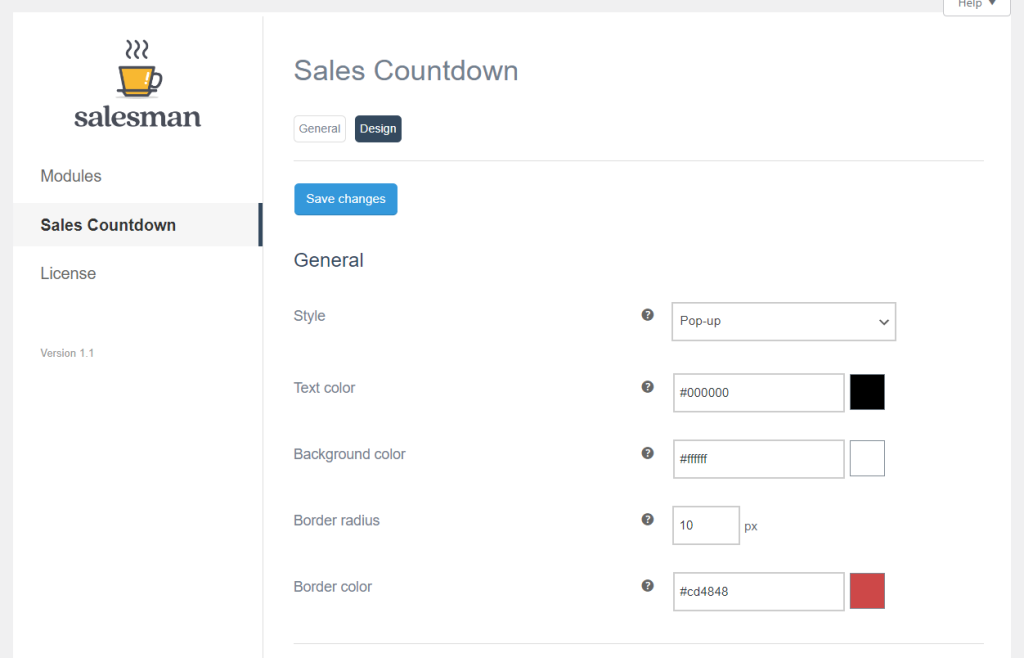
- The Style setting under General allows you to decide if you want the timer to appear as text within the product description, or a popup.
- Next, you’ll be able to customize the design of this by picking the text color, background, border radius, and more.
- Depending on which Style you picked earlier, the next section will change. Either way, you’ll be able to decide where the countdown timer is positioned, the timer icon, padding, margin, and more.
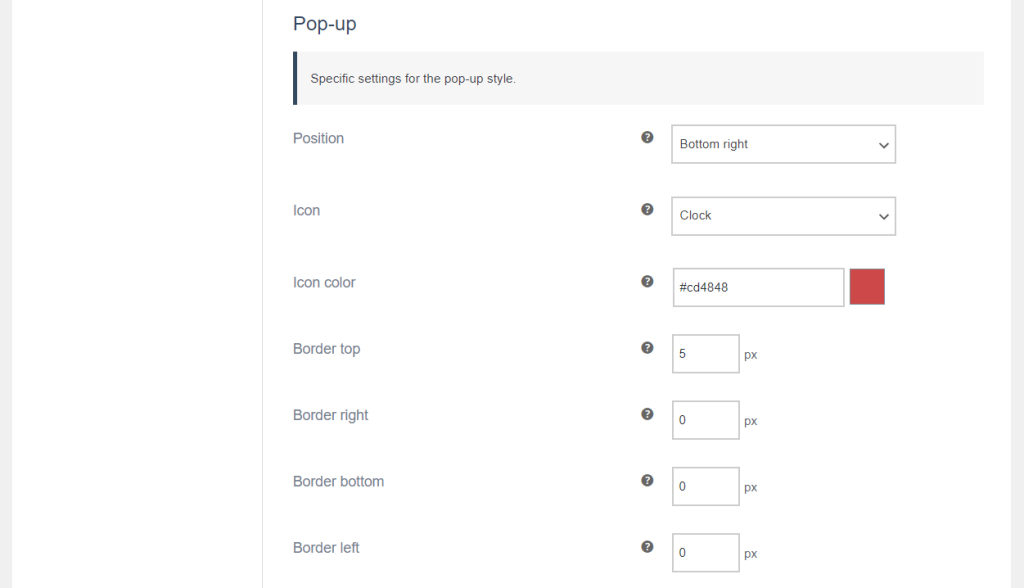
- Once you’re happy with all these changes, click the blue Save Changes button at the bottom of the page.
That’s it. Your WooCommerce countdown timer is now set up and running. Check the frontend of your WordPress website to see if it’s working how you want, and tweak it as you go.
Add a WooCommerce countdown timer to your WordPress ecommerce store today
In this guide, we showed you how to create a sale for your WooCommerce store and add a sales countdown timer to instill a sense of urgency in your customers.
With this in place and the other tools you can use with Salesman, you’ll be able to boost your store’s sales without the effort.
Customer loyalty made easy
Features for customer loyalty with smart functions to increase usability and traffic. Selling easier than ever: Salesman.