
Updated 15.10.2019
The online shop extension WooCommerce is a powerful tool with countless settings. The following guide shows you how to optimize the shop system to your needs.
As soon as you have installed WooCommerce for WordPress , you can start to create and sell your products. But with individual settings you can get even more out of your webshop. All options discussed here can be found in the WordPress backend under WooCommerce -> Settings.
Settings in tab General
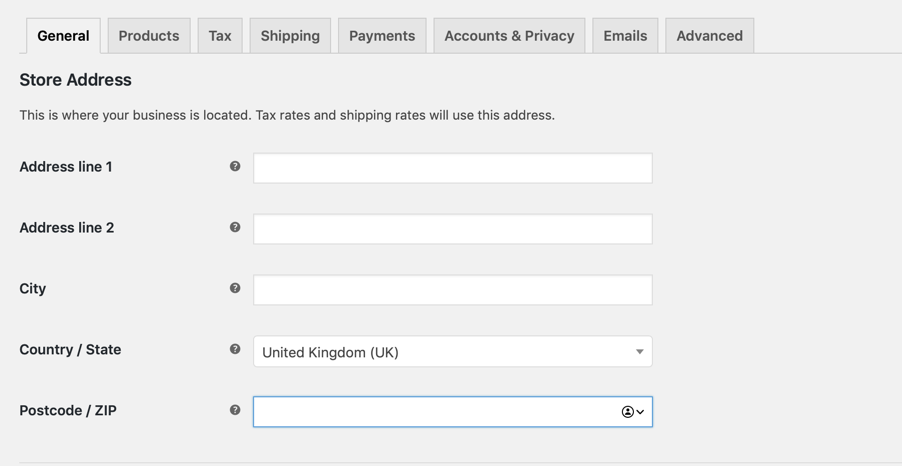
First fill out your store adress fields under Store Address. These fields will be used to calculate your taxes and shipping costs:
Then you set the General options of WooCommerce:
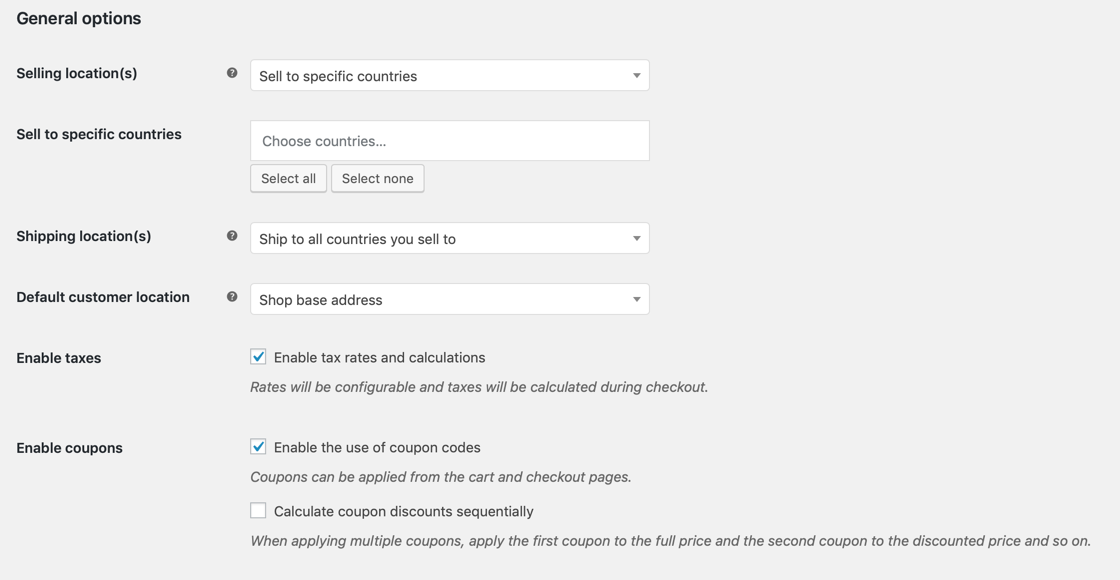
- With Sell to specific countries you determine to which countries you want to sell your products and also ship them. The preselection is Sell to all countries. If you select Sell to all countries except for… or Sell to specific countries , an additional selection box will open, where you can add or exclude selected countries. In the ordering process, the customer can then only enter order or delivery addresses from the group of countries formed by this.
- The situation is similar for shipping location(s). Here you can choose whether you want to ship to all countries (e.g. also to delivery addresses outside the points of sale), only to those to which you also sell, only to certain countries, or whether the shipping cost calculation should be completely deactivated.
- With the option Default customer location you control which country WooCommerce should choose before your customer enters his address. For example, to calculate shipping costs. Here you can choose the base country or address of your online shop or different methods of geolocalization.
- Enable taxes and their calculation controls whether WooCommerce should calculate taxes. Usually this option must be activated, at least if you sell from Germany, Austria or Switzerland.
- If you want to assign vouchers to your customers, you need to set the option Enable the use of coupon codes.
- In the section Calculate coupon discounts sequentially you define how WooCommerce should handle the simultaneous submission of several discount codes.
Notice: If you change individual settings, you must confirm this at the bottom of the page by clicking the “Save changes” button. Otherwise the warning “This page asks you to confirm that you want to leave the page…” will appear when you switch to another tab or page.
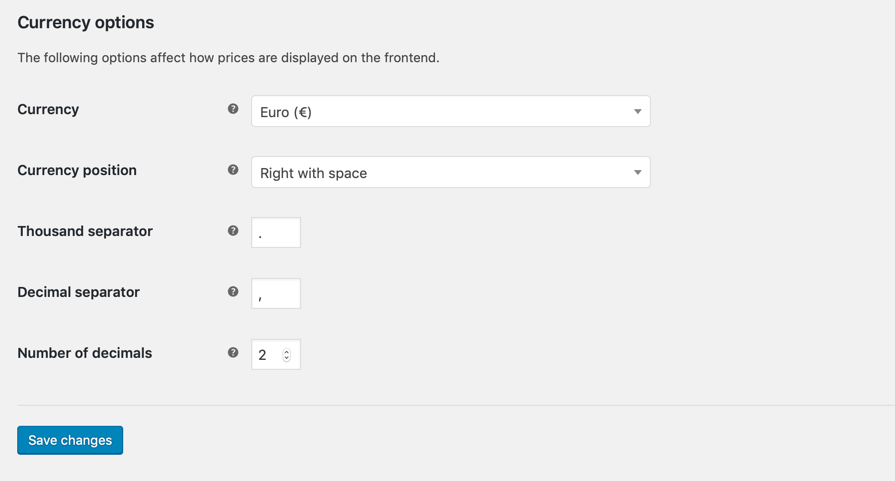
Then the Currency options or currency settings of WooCommerce can be defined more precisely:
If you have installed the plugin German Market, the correct values for the German-speaking area are already preset.
Notice: German Market for WooCommerce makes your WooCommerce shop fit for the German-speaking market and the entire EU. Including legally relevant content, integrated invoicing, connection to your accounting system, processing of refunds and much more. Further information.
Otherwise you can select them manually:
- The Currency in which the products are listed in the online shop. At the same time, this determines the currency under which payments are shown or accepted in the ordering process.
- The Currency position determines whether the currency symbol appears on the right or left when prices are quoted (example: € 99.99 or € 99.99). You can also set a space between the currency symbol and the amount.
- below you can customize the Thousand separator and the Decimal separator. In the local language area, a dot (thousands separator) and a comma (decimal separator) are usually used for this purpose.
- You can also set the Number of decimal, usually two.
Settings in tab Products
This central area determines how WooCommerce handles the presentation of products at different points in the shop. Let’s have a look at the submenu General (Directly below the tabs you can choose between different submenu items). There are the areas Shop pages and Measurements:
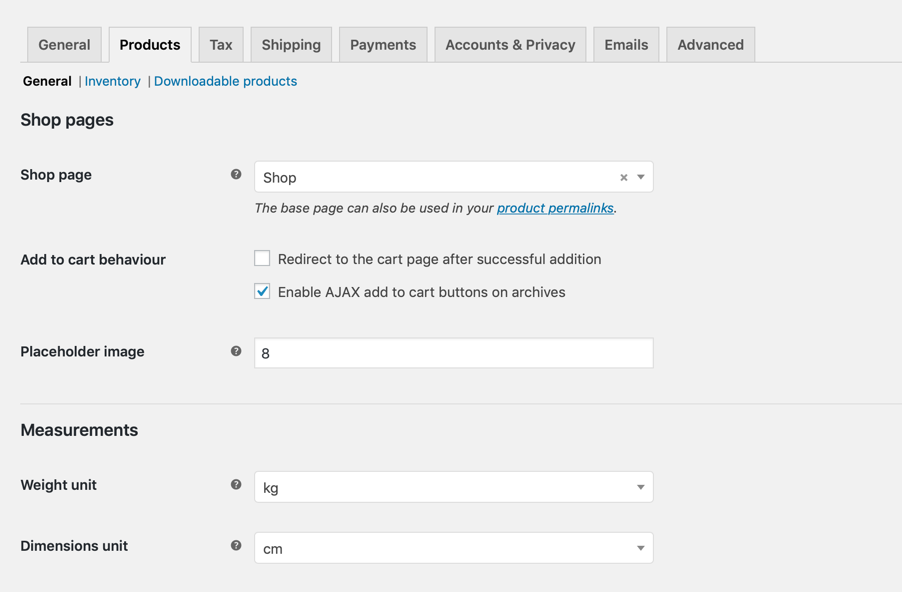
- Shop page defines which WordPress page is responsible for the presentation of the online shop itself – i.e. with its products. As a rule, this is the page preset by WooCommerce Shop.
Notice: This also determines the permalink base of products in the shop, if the option “Shop base” or “Shop base with category” is selected under -> Settings -> Permalinks -> Product permalinks in the WordPress backend. In case of “Shop” as product archive or shop page, the permalink of products would then be /shop/.. instead of /product/...
- If “” is activated the buyer is immediately forwarded to the shopping cart, if he clicks the button Add to cart for a product.
- If the option “Redirect to the cart page after successful addition” is deactivated and the function Enable AJAX add to cart buttons on archives is selected, the addition of a product to the shopping cart is signaled directly at the button Add to shopping cart without reloading the page. Otherwise a corresponding note would be displayed in a separate note field (usually at the top of the corresponding page, depending on the shop theme).
- For the dimensions you define the suitable weight unit (kilogram) as well as the weight unit (centimeter) for the shop, the latter used to be called size unit in WooCommerce. Both options are important if you have products that need to be labeled accordingly.
Finally, you decide how WooCommerce should handle Reviews:
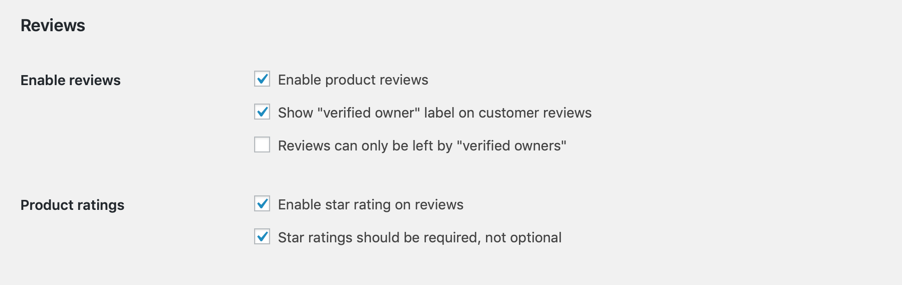
- Enable product reviews unlock the corresponding area for your users or not.
- Show “verified owner” label on customer reviews shows the message Verified Owner in product reviews as soon as they have been carried out by a registered customer (this customer must have actually purchased the corresponding product).
- Reviews can only be left by “verified owners” means: Only registered users can leave a rating. To do this, they must be logged in with the account that actually made the purchase.
- If star rating in reviews is checked, customers can additionally assign a rating according to the star principle (one to five stars) for submitted product ratings (in text form).
- You can make the star rating by Star ratings should be required, not optional also make it mandatory.
Notice: If you don’t want to use customer reviews, then alternatively use this guide.
Up to the WooCommerce versions 3.x there was additionally the menu item Product Catalog. There you could define how WooCommerce displays the product catalogue and the product images. You can now find these options in the WordPress customizer under -> Design -> Customizer -> WooCommerce:
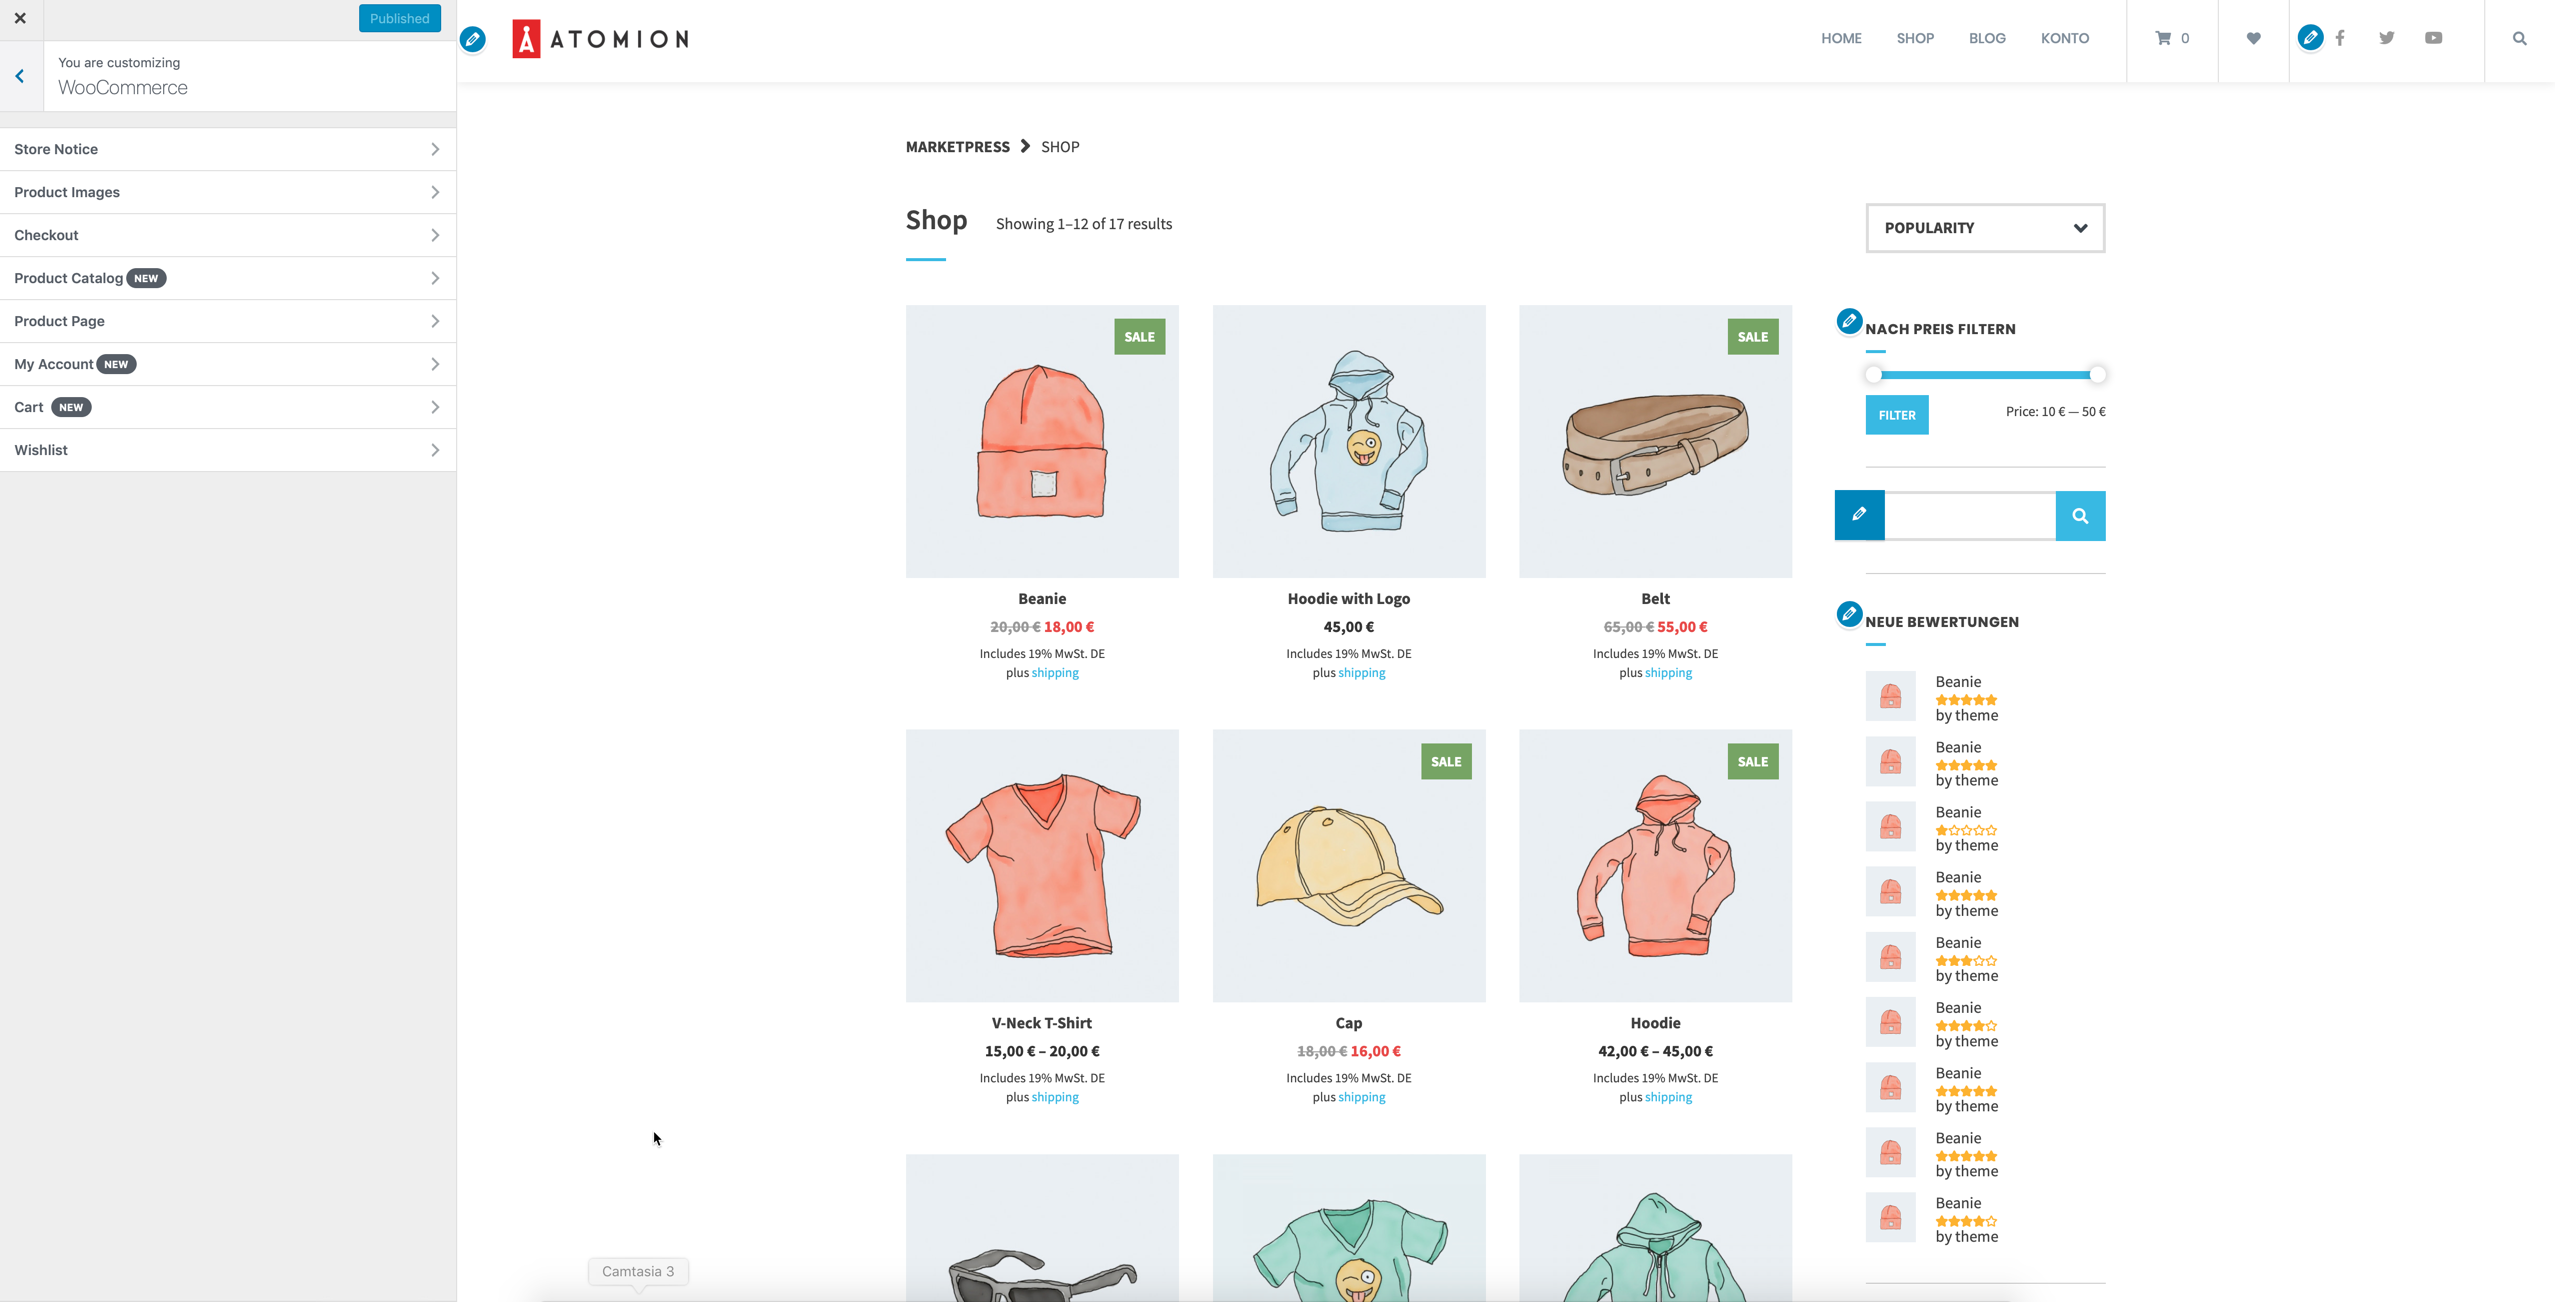
Many themes like Atomion provide further options here, for example to change the appearance of wish lists. In the default of WooCommerce or for all themes you can define:
- Define in Store Notice a shop-wide hint text, e.g. to identify a demo shop or to display special offers.
- In the area Product Catalog you determine whether the products and/or the product categories should be visible in the shop, what appears on the category or archive pages (products and/or subcategories), how the standard product sorting looks like and how many products are displayed per row or how many rows per shop page.
- The Default product sorting determines the order in which products appear in the shop (customers can change this sorting on the portal). For example according to relevance, popularity, customer rating or price ascending/descending. You certainly know this possibility from portals like Amazon.
- Finally you define how WooCommerce should crop the product images and thumbnails (square, user-defined or uncut).
How WooCommerce displays and calculates your images always depends on the theme you use. The ideal settings should be defined in the documentation of the theme developer. If you want to change to a new design, then pay attention to the following guideline: The more the supported product image sizes of the old and the new theme differ, the higher your administrative effort will be to adjust all product images. You should check this in advance with a test system or clarify it with the developer of the new theme.
Notice: If the values set at WooCommerce deviate from the actual display, this may have to be corrected in the theme options. If you change the image sizes afterwards or when using a new shop theme, the WordPress plugin Regenerate Thumbnails provides valuable services. It recalculates all images or image sizes so that they are no longer distorted. Before installing the plugin you should backup your complete system – and with it all uploaded images – including the database. In the worst case, the recalculation can cause unexpected side effects.
Under Products -> Inventory you can set how WooCommerce deals with the stock or products in stock of your online shop:
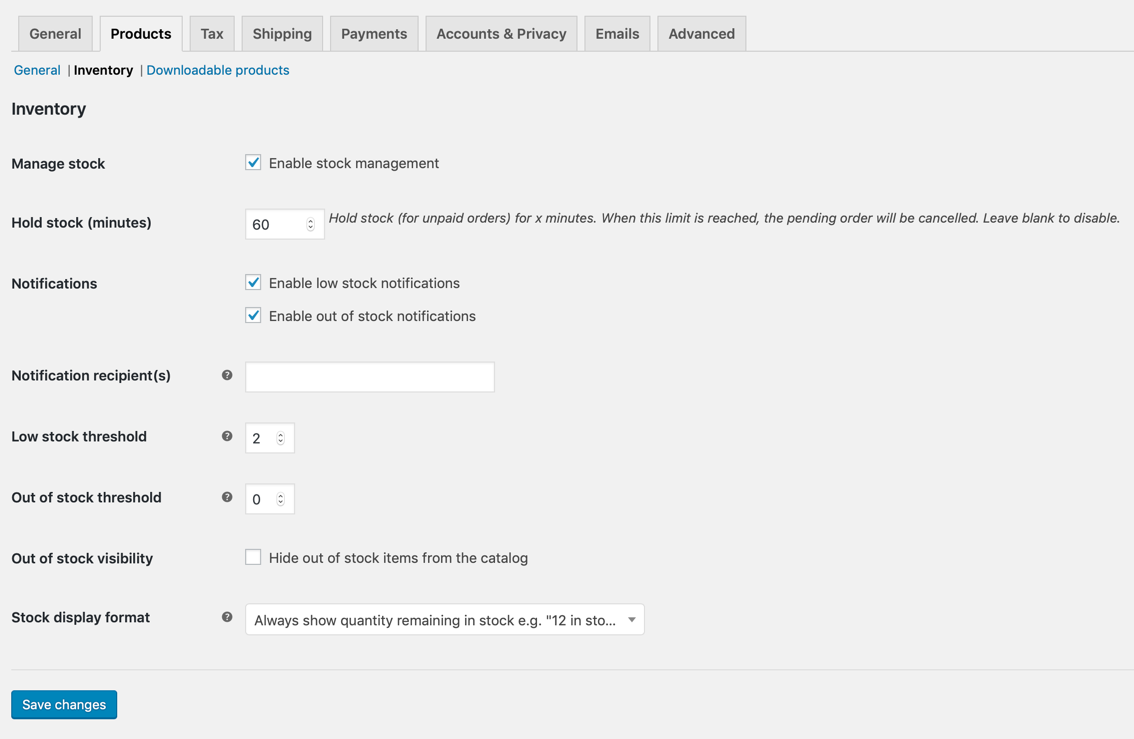
- The first option Enable stock management determines whether WooCommerce should generally use inventory management, i.e. whether it calculates the number of items still available for a product purchase, for example.
- Hold stock (minutes): This stops/reserves stock for products when an order has been placed but not yet paid for. After the entered period the unpaid order will be cancelled and the stock will be released again. If the field is left empty, the function is deactivated.
- Notifications can be activated when the stock level is low and/or when the status “not in stock” is reached. Use the following fields to set the threshold values at which such a warning e-mail will be sent and the corresponding e-mail address.
- With Out of stock visibility you can hide products that are no longer in stock in the product catalogue of the shop.
- The settings under Stock display format control whether the concrete stock of a product is always displayed, only when stock is low, or never.
Finally the menu item Products -> Downloadable products:
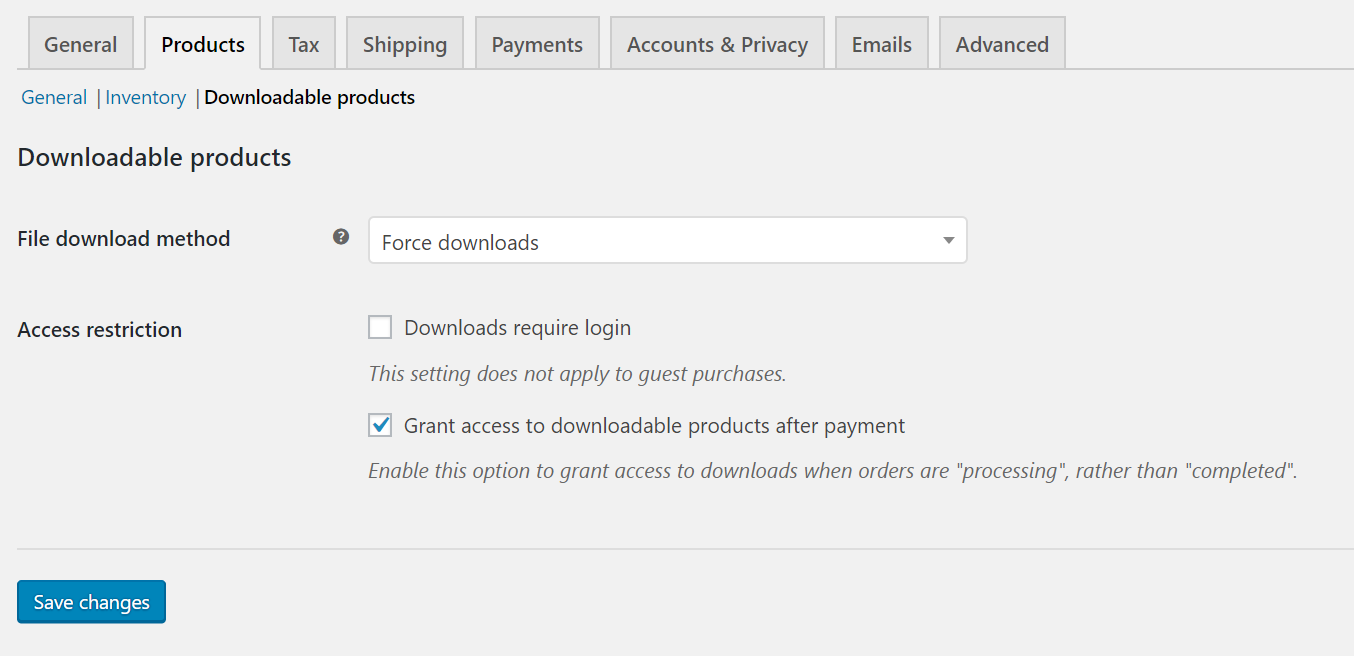
- The File download method defines how WooCommerce handles digital products which the customer can download.
- The option Force downloads allows you to start the download immediately by using a PHP script. The download URL itself remains hidden, but some web servers do not make larger files available reliably in this way.
- X-Accel-Redirect / X-Sendfile is mostly more performant and supports larger files. This can be used, for example, to offer downloads from protected directories or hidden paths. See this description.
- For Forward only a simple link to the file is provided. However, this link is not protected against external access.
- Under the item Access restriction further settings can be made. The option Downloads require login speaks for itself, but it does not affect guest orders only.
- Grant access to downloadable products after payment means that the files can be accessed already in the order status “in progress”, not only or “completed”. Thus the customer can use the digital commodity directly after payment, without one must become active as Shop owners and/or confirm the purchase.
The review of the options described here will take some time. The general settings and the product options, however, conceal numerous possibilities for making the sales process more efficient in the long term.
You have questions to the individual points? Place these gladly in the comments. You want to be informed about future instructions for WooCommerce? Then follow us on Twitter, Facebook or via our Newsletter.
Other instructions around WooCommerce can be found here: